Overview
Many software developers know a little bit about Vim and grudgingly use it when nothing else is available. This article aims to quickly make you more productive when using Vim and perhaps even convince you that there are reasons to prefer it over other editors. Even if you don't adopt Vim as your primary editor, you may wish to enable a Vim mode in your editor/IDE of choice.
The primary goal of this article is to make you more productive without requiring any custom configuration or plugins. This is not to suggest that you shouldn't customize Vim or use plugins, just that it isn't necessary in order to be productive. By learning only a few things, you can make the experience of using Vim much nicer.
There are many Vim cheatsheets on the web. The first five sections of this article repeat the most frequently used parts of that information. If you already have Vim installed and understand the basics, feel free to skip ahead to the netrw section.
Installing
If you are working on a Mac or a Linux system, Vim is already installed. However, you may wish to install a newer version.
To install Vim in Windows, browse https://vim.sourceforge.io/download.php#pc, select an installer to download, and run it.
To install Vim in macOS, first install Homebrew (https://brew.sh/). Then open a Terminal window and enter brew install vim. Alternatively, install MacVim by browsing https://macvim-dev.github.io/macvim/.
To install Vim in Linux ... If you are using Linux you likely already know how to do this.
Starting
If using a GUI version of Vim like MacVim, double-click the application icon to start it. If using a terminal-based version of Vim, open a terminal (or Command Prompt in Windows) and enter vim. This can be followed by a file path to open a specific file, but as we'll see it is very easy to locate and open files from within Vim.
Next, we will cover some Vim basics including modes, commands, writing, and quitting. It would be easy to go overboard. We just want to hit the highlights to get you started. This will be review for many of you.
Modes
Vim is a modal editor. That means you are always operating in a specific "mode." Key presses behave differently based on the current mode. The most commonly used modes are command, insert, and visual.
For those who dislike Vim, modes are typically the primary reason. Interestingly this is also true for those that like Vim! Modes are the key to why working in Vim is so efficient. They are also a major distinguishing factor between Vim and emacs.
Command Mode
This mode is for running commands, many of which operate on text in the current buffer. There are many keys that can be pressed to run a command, but the most commonly used are these:
| Key | Action |
|---|---|
cw |
changes word starting at cursor; removes word and enters insert mode so replacement can be entered |
c$ |
changes everything from cursor to end of line; removes rest of line and enters insert mode so replacement can be entered |
dd |
deletes current line, placing it in the clipboard |
dw |
deletes word starting at cursor, placing it in the clipboard |
d$ |
deletes from cursor to end of current line, placing it in the clipboard |
dt followedby a character |
deletes from cursor "to" first occurrence of specified character, placing it in the clipboard |
J |
joins next line to current line |
p |
pastes clipboard contents after character under cursor |
P |
pastes clipboard contents before character under cursor |
r |
replaces character under cursor with next character typed |
u |
undoes last change; press repeatedly to undo multiple changes |
ctrl-r |
reverses last undo; press repeatedly to redo multiple undo's |
y |
yanks (copies) character under cursor into the clipboard |
yw |
yanks (copies) word starting at cursor into the clipboard |
yy |
yanks (copies) current line into the clipboard |
y$ |
yanks (copies) characters from cursor to end of current line into the clipboard |
x |
cuts character under cursor, placing it in the clipboard |
z enter |
moves current line to top; especially useful when cursor is on the first line of a long function definition and you want to see as much code as possible on the screen at once |
~ |
toggles case of character under cursor |
. |
repeats last command; It cannot be overemphasized how useful this is! |
/text or/regex |
finds the next occurrence of the specified text; press n to repeat the search forwardor N to repeat the search backward |
%s/old/new/gor %s/regex/new/g |
replaces all occurrences of matching text in the entire file with the specified text; add c to end of command to confirm each replacement |
:set numberor :set nu |
shows line numbers |
:set nonumberor :set nonu |
hides line numbers |
Many commands can be preceded by a number to execute the command that many times. For example, 3dd deletes three lines starting with the current one.
Also see keys for movement described later.
Insert Mode
This mode is for inserting text into the current buffer. There are many keys that can be pressed to enter insert mode.
| Key | Enters Insert Mode ... |
|---|---|
i |
before character under cursor |
a |
after character under cursor |
I |
before first non-whitespace character on current line |
A |
after last character on current line |
o |
opening new line below current line |
O |
opening new line above current line |
esc or ctrl-[ |
exits insert mode and returns to command mode |
Visual Mode
This mode allows you to select text visually, either by characters or by lines. After entering visual mode, move to the opposite end of the desired selection and enter a command to act on the selection.
| Key | Enters Insert Mode ... |
|---|---|
v |
enters character-based visual mode |
V |
enters line-based visual mode |
x |
cuts selected text and exits visual mode |
y |
yanks (copies) selected text into the clipboard and exits visual mode |
~ |
toggles case of all selected characters and exits visual mode |
esc or ctrl-[ |
exits visual mode and returns to command mode |
Movement
| Key | Moves ... |
|---|---|
j |
down |
k |
up |
h |
>left |
l |
right |
0 |
beginning of line |
$ |
end of line |
^ |
first non-whitespace character on line |
w |
next word |
b |
previous word |
gg |
top of file |
G |
bottom of file |
| line number followed by G |
to line number |
ctrl-f |
forward one page |
ctrl-b |
backward one page |
% |
to matching delimiter when cursor is on one of the following delimiters { } [ ] ( ) /* */ |
Writing and Quitting
| Command | Action |
|---|---|
:w |
writes current buffer to associated file |
:wfile-path |
writes current buffer to specified file |
:q |
quits Vim, but not if there are unsaved changes |
:q! |
quits Vim even if there are unsaved changes |
:wq |
writes and quits |
netrw
Many people who use Vim only occasionally quit out of Vim and restart it in order to edit a different file. This is unnecessary. The netrw utility that comes with Vim makes it easy to locate and open multiple files.
netrw stands for "NETwork-oriented Reading, Writing, and browsing."
While it does "net" things, netrw is also really great for exploring the file system. Some people prefer to use plugins such as NerdTree for this, but netrw works great and doesn't require configuration or a plugin.
To open a netrw "explorer" in the current window, enter :E.
To open one on the left side of a new vertical split, enter :Ve.
To open one on the bottom side of a new horizontal split, enter :He.
To open one when starting Vim, start it with vim +E or vim ..
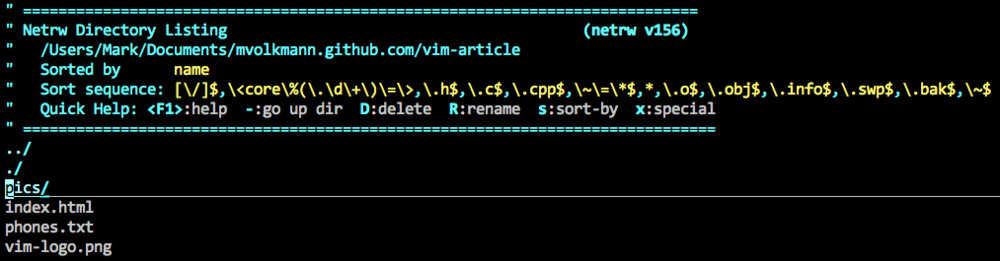
Here's a screenshot of the netrw explorer.
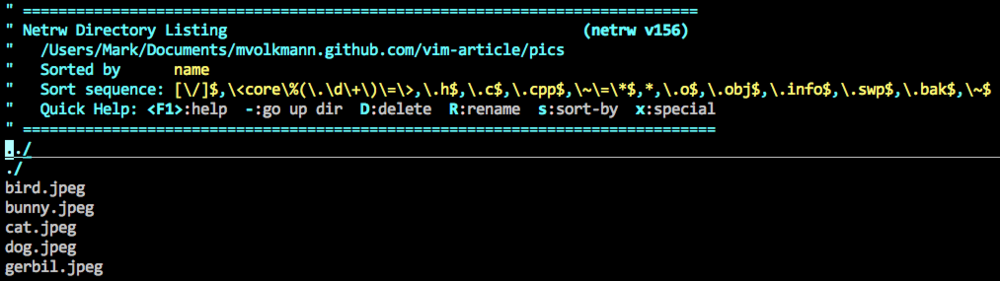
Here's a screenshot after pressing enter with the cursor on the "pics" directory. Doing this navigates into the directory and displays the files and directories found there.
Use normal motion keys to move the cursor to a file or directory name. Use the commands described below to operate on the file under the cursor.
| Command | Action |
|---|---|
| enter | opens file for editing or directory for further navigating |
R |
renames file or directory; will prompt for new name |
D |
deletes file or directory (if empty) |
For more information on netrw, see https://shapeshed.com/vim-netrw/.
Buffers
When multiple files are opened in a Vim session, each is held in its own buffer. Here are commands that operate on buffers.
| Command | Action |
|---|---|
:ls |
lists all current buffers |
b followed by abuffer number |
opens specified buffer |
bd followed by aspace-separated list of buffer numbers |
deletes specified buffers, but not their associated files; deleted buffers will no longer appear in :ls output. |
Here's a screenshot after entering :ls with a few buffers opened.

To open the phones.txt buffer, enter b4.
Splits
It is often useful to view two or more files simultaneously. To do this, open the corresponding buffers in different "splits."
Splits make it easier to copy content from one file and paste it into another. They can also be used to view multiple parts of the same file simultaneously.
Here are commands that operate on splits.
| Command | Action |
|---|---|
ctrl-ws or:split orjust :sp |
splits current window horizontally |
ctrl-wv or:vsplit orjust :vs |
splits current window vertically |
| ctrl-wc or ctrl-wq or :close orjust :clo |
closes current split |
ctrl-wo or:only orjust :on |
closes all splits except current one |
| ctrl-ww | moves cursor to next split; press repeatedly to cycle between them |
Macros
Macros record a series of keystrokes and assign them to a Vim register so they can be replayed by a key combination.
Here are commands for creating and running macros.
| Command | Action |
|---|---|
q followed bya register letter |
begins recording a macro in the specified register |
q |
when already recording a macro, ends the recording |
@ followed bya register letter |
executes the macro in the specified register |
@@ |
executes the last macro that was executed; faster than typing @ and a register letter for repeated execution |
It may not be obvious why macros are useful, so let's walk through an example.
Suppose you are editing a text file that contains many phone numbers formatted like "123-456-7890" and you need to change them to "(123) 456-7890."
You can create a macro to do this by moving the cursor to the beginning of a phone number and pressing the following keys (where esc is the escape key):
qpi(escllllr)q
Let's break this down.
qp begins recording a macro in the p register.
i(esc enters insert mode, inserts a left paren, and exits insert mode.
llll moves right four characters. This could also be done with 4l.
r) replaces the character under the cursor, a dash in this case, with a right paren.
q ends the macro recording.
Now that the macro has been recorded, move to other phone numbers and press @p to format them.
After the macro has been run once, it can also be run by pressing @@.
To make this even better, add a command at the end of the macro to automatically find the next phone number in the file. This could be done with /\d\{3}-\d\{3}-\d\{4}enter. This finds a phone number using a regular expression where \d represents a digit and {n} represents a number of consecutive occurrences. The opening braces must be escaped with backslashes.
Once this is in place, the macro can be run a specified number of times by entering a number followed by @p. For example, to fix the next ten phone numbers beginning with the one starting at the cursor position enter 10@p.
While this example is not related to software development, similar reformatting is frequently needed in that setting.
Macros are one of the reasons I cannot bear to use another editor. There are too many occasions where macros save me a tremendous amount of time to consider using an editor that doesn't support them.
Summary
This article covered everything you need to know to make effective use of Vim.
Of course, it can be made even better by configuring certain aspects in a .vimrc file or adding the use of plugins. But those are more advanced topics that you can learn about elsewhere.
Using Vim has been a game changer for me. I believe that by adopting Vim, you will make yourself more productive and happier when editing text files!
Please send feedback on this article to mark@objectcomputing.com.
Acknowledgments
I want to thank Charles Sharp (Object Computing, Inc.) for reviewing this article and making it better!
Software Engineering Tech Trends (SETT) is a regular publication featuring emerging trends in software engineering.
